For years I listened to marketers tell clients things like “90% of your orders came from new visitors”; while the true % of orders attributable to new customers was actually far less. This reporting metric offers a very disingenuous view of customer acquisition. While a customer may be a “new visitor” by Google’s standard, many have actually been to the site numerous times before and even completed purchases. It’s 2022 and it’s time everyone did better.
Using Liquid to Send Shopify Data to Google
Shopify’s Liquid language offers even junior developers the ability to interact with data in Shopify and surface it within site pages to send to other platforms. With a few simple snippets we can pull customer level data from Shopify and send it to our analytics platform.
To get started with Liquid check out Shopify’s Cheat Sheet: https://www.shopify.com/partners/shopify-cheat-sheet
Variables Required
{% if %} – for control flow
{{ first_time_accessed }} – True if it’s the users first time accessing the page
{{ customer }} – The customer object which contains info about the user if they are a customer
{{ customer.id }} – The ID assigned to the customer by Shopify
{{ customer.orders_count }} – The historic order count attributed to the customer in Shopify
{{ customer.total_spent }} – The total monetary value of all orders the user has placed
The Script Setup
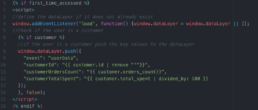
The script will first check whether this is the users first time accessing the page. This is important because we only want to fire our script on a users first time loading the page to prevent duplication in the analytics platform. Next, the script will check if the user is a customer. We are placing this scrip on the confirmation page of the site so this should always be true, but we do it just in case to prevent bad data capture. Finally, the script will send the customers ID, historic order count, and lifetime revenue value to the dataLayer for us to pickup and send to other platforms.
Here is the script:
Adding the Script to Shopify
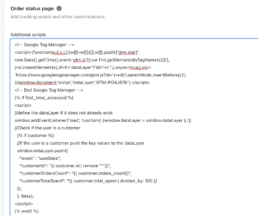
The script should be added to the additional scripts section of your Shopify store. You can find this under the store settings which live at the bottom of the left hand menu next to the gear icon. Under settings you will then select Checkout and then scroll down on the page until you find Additional Scripts under the Order status page section. You will then paste your snippet within this section.
You must also ensure that your Google Tag Manager snippet is added in this section as well. It should look like this when you are finished:
Capturing the Data in Google Tag Manager
Within Google Tag Manager you will start with a trigger configuration that will fire tags based on the custom event that we have just sent to the dataLayer. The trigger should look like this:
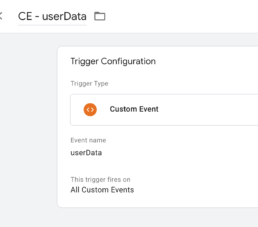
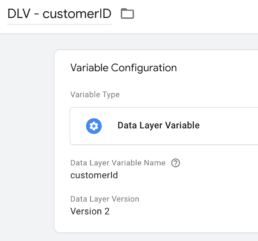
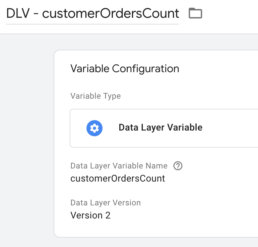
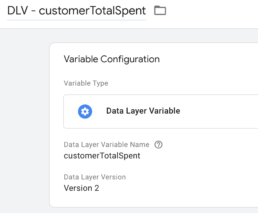
Next, you will create dataLayer variables for each of the Shopify data elements that we have sent to the dataLayer. The variables will look like this:
This is also a great time to add a variable that tracks the Google Client ID which will add an additional layer of tracking that helps with creating user journeys that lead to purchase. The client ID can be captured with this JavaScript variable:
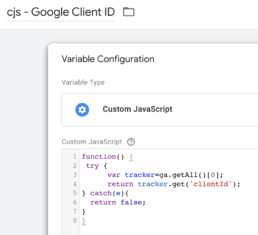
These variables can now be utilized to send data via Google Tag Manager to any third party platforms.
Enhanced Downstream Reporting
This custom data capture allows you to do downstream reporting based on customer status, ID, journey, and CLV. Here are a few example reports with questions:
What percent of Paid Search Orders are new customers vs returning customers?
This can be further broken down by campaign, audience, and creative to show how specific campaigns contribute to customer acquisition vs. retention.
What is the Lifetime Value of the Customers purchasing on site and which channel drove them?
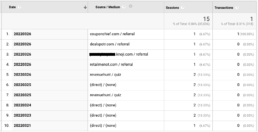
What Does the Path to Purchase Look Like for Customers?
Here is an example of a customer who visits the site 15 times over the course of a week while making their purchase decision. They start with a direct visit, but then search on reviews sites to find reviews on the product and ultimately purchase through a coupon site. Does the coupon site truly deserve credit for this order?
These data enhancements will allow you to get a much better view at the channels that are truly driving new customers for your business. This will allow you to get a much better channel by channel look at true customer acquisition costs. It also allows you to create your own attribution for orders based on the channels that a customer interacts with on their journey.



Nice Article! Andrew Jones
nice article, how can we download the script?
Hi Faysal,
I don’t have a download link for the script in the article unfortunately. WordPress prevents me from uploading script files for people to download. Your best bet is to just copy the script character for character from the screenshot in the article.